
Table of Contents
- Directories
- Installation
- Theme Options
- Import Demo Content
- Primary Menu
- Widgets
- Home Page
- Contact Form
- How to Translate
A) Directories
ephesus - Contains theme files.
help – Help file (HTML).
licensing – GPL descriptions.
psd – Preview PSD file.
B) Installation
Current documentation was created to help you with quick installation and configuration of Ephesus theme. Please, read it carefully to avoid most of potential problems with incorrect configuration.
To install this theme you must have a working version of WordPress already installed.
For detailed Wordpress installation instructions visit https://codex.wordpress.org/Installing_WordPress
Download the zipped package from ThemeForest and extract to your desktop. In the extracted package you will find ephesus.zip file which is the WordPress theme.
You can install the theme in two ways:
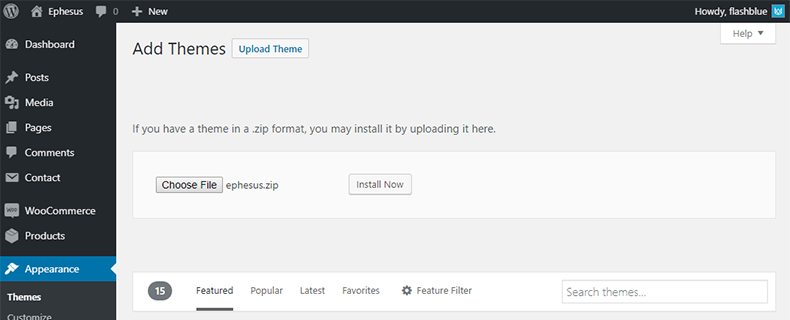
- WordPress: Navigate to Appearance > Themes > Add New > Upload Theme page. Select ephesus.zip file. Press the Install Now button to upload and install the theme.
- FTP: Extract ephesus.zip file (Inside there's a folder, also named ephesus) and upload the extracted folder to /wp-content/themes/ folder on your server. Navigate to Appearance > Themes and activate Ephesus theme.
Once you have activated the theme you will need to change some of the pages and media settings for optimal performance.
C) Theme Options
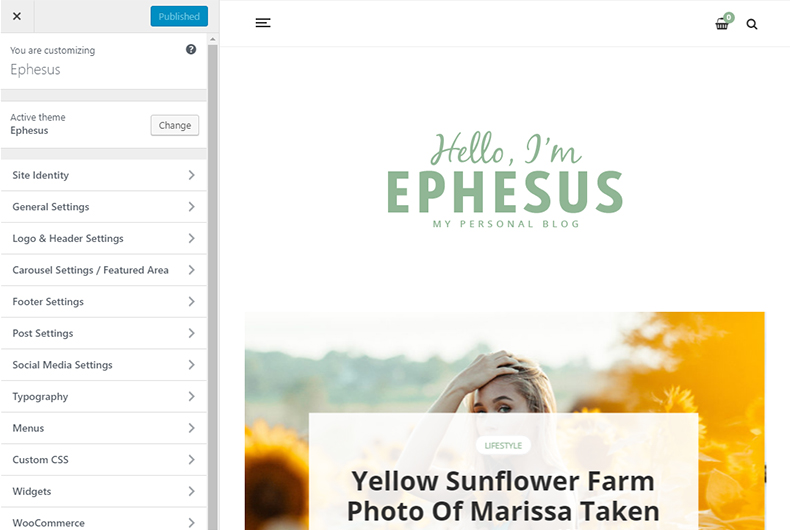
After the installation you can make your own settings. Please, open Appearance / Customize and make site-wide settings. The customizer includes the following sections:
- Site Identity
- General Settings
- Logo & Header Settings
- Carousel Settings / Featured Area
- Footer Settings
- Post Settings
- Social Media Settings
- Typography
- Menus
- Custom CSS
- Widgets
- WooCommerce
D) Import Demo Content
If you want to have the same website as Live Preview of theme, you’ll need to import demo content.
There're 2 ways to import demo data:
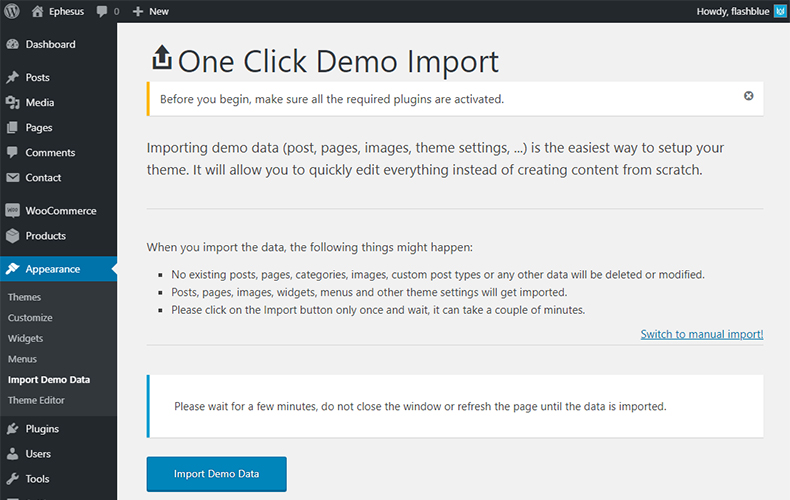
1. One Click Demo Import
- Go to Appearance > Import Demo Data
- Click on Import Demo Data
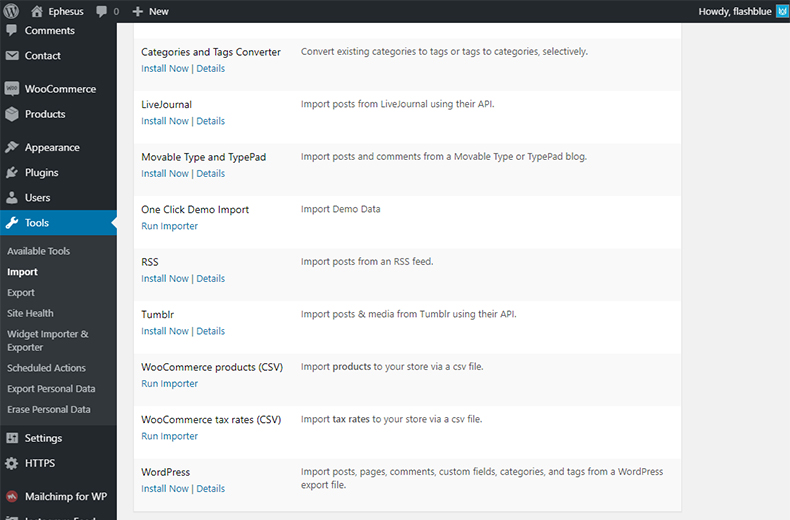
2. Import Demo Data Manually
- Go to Tools > Import > WordPress
- Install the plugin offered and you will see a file form
- Unzip ephesus/plugins/ephesus.zip
- Upload the ephesus/plugins/ephesus/demo/content.xml file
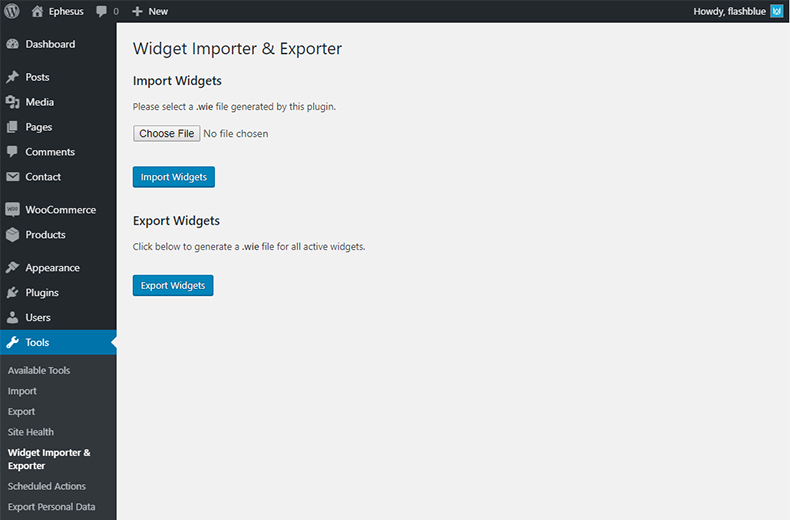
Import/Export Widgets
- Install & Activate Widget Importer & Exporter plugin via Plugins / Add New / Search plugins.
- Go to Plugins / Installed Plugins
- Click on Tools / Widget Importer & Exporter
- Choose the ephesus/plugins/ephesus/demo/widgets.wie file to upload, then click Import Widgets
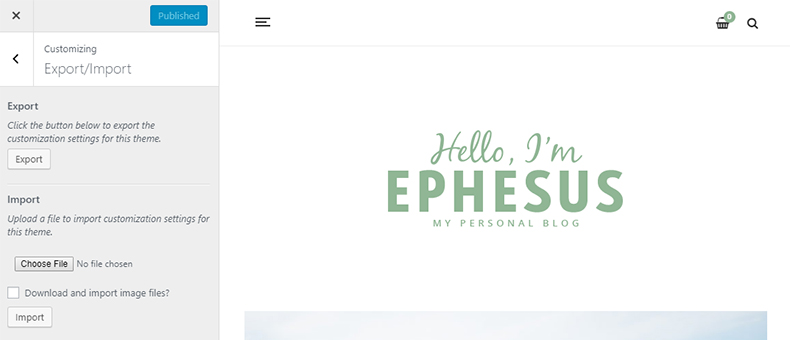
Import/Export Customizer
- Install & Activate Customizer Export/Import plugin via Plugins / Add New / Search plugins.
- Go to Appearance / Customize
- Click on Export/Import
- Choose the ephesus/plugins/ephesus/demo/customizer.dat file to upload, then click Import
E) Primary Menu
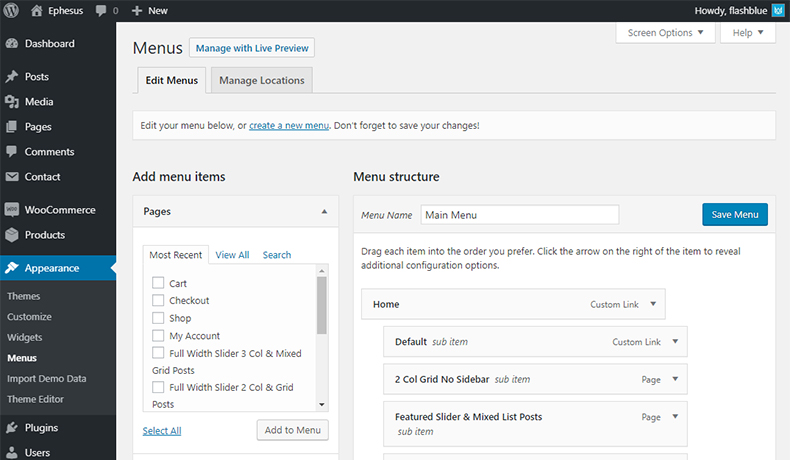
Ephesus supports custom WordPress menu. Navigate to WP Admin Appearance > Menus page and create menu. Select the newly created menu from the theme locations dropdown box Main Navigation as it mentioned on screenshot and press Save button.
F) Widgets
A widget to put it simply its a block of code that we can put into various areas, also known as sidebars. Navigate to Appearance > Widgets and lets get started. Ephesus comes with the following sidebar areas:
- Sidebar
- Shop Sidebar
- Header WooCommerce Cart
- Instagram Footer
- Footer Left Side
- Footer Center Block
- Footer Right Side
You can choose what sidebar to show on blog page, search and archive pages, post page at customizer layout settings.
Ephesus comes with 5 different custom widgets.
-
Ephesus: About Me
A widget that displays an About widget -
Ephesus: Facebook Like Box
A widget that displays a Facebook Like Box -
Ephesus: Latest Posts
A widget that displays your latest posts from all categories or a certain -
Ephesus: Post Carousel
A widget that displays posts carousel from all categories or a certain -
Ephesus: Social Icons
A widget that displays your social icons
G) Home Page
Ephesus comes with a straightforward and simply homepage. If you would like to adjust the amount of posts shown per page you can go to Settings > Reading and change Blog pages show at most to another number.
H) Contact Form
For contact page we recommend the plugin Contact Form 7 and have done pre-styling for this plugin. When you create your form use the following mark-up:
<div class="wp-block-columns has-2-columns">
  <div class="wp-block-column">
    <label> Your Name (required)
    [text* your-name placeholder ] </label>
  </div>
  <div class="wp-block-column">
    <label> Your Email (required)
    [email* your-email] </label>
  </div>
</div>

<label> Subject
    [text your-subject] </label>

<label> Your Message
    [textarea your-message] </label>

[submit "Send"]
I) How to Translate
The translation file you can find in languages folder (/wp-content/themes/ephesus/languages). Edit the .po file using POEdit, use the translation field to make replacements. Read here how to do it right.
From the file menu, save file with your language name e.g de_DE.po into languages folder. It will generate both a *.po and *.mo file for your translation.
Next edit wp-config.php located in the root folder of wordpress and define the WPLANG prefix with your language name which should be similar to the translation file name.